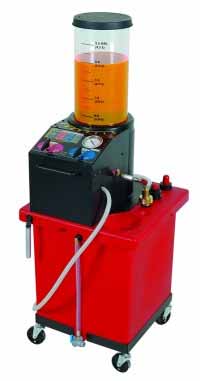
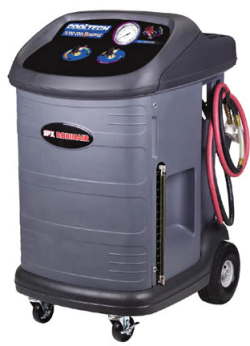
Coolant Flush tools Uview 570000 Robinair 75700
How to properly flush your cooling system manually
Your vehicle’s cooling system can become corroded after years of use. This corrosion occurs from the minerals in your coolant collecting inside your cooling system. Some other damage may occur over time due to old age of your vehicle’s cooling system. Another damaging factor could be that your vehicle has some sort of mechanical malfunction which damaged the cooling system.
Before beginning the task of flushing your cooling system we must talk about the hazards of coolant. Coolant is hazardous if swallowed. This means that animals or small children could come in contact and possibly become harmed. I suggest that you make sure to catch all of the coolant and properly dispose of it in a safe manner. Make sure to wipe up any spilled coolant as well.
The Procedure
- You will want to make sure your engine on your vehicle is cool. If it is not you may be burned by hot coolant and harmed due to a pressurized cooling system.
- Safely position your vehicle on set of car ramps or a set of jack stands.
- Locate your radiator drain plug.
- With the drain plug located position a drain pan or bucket underneath the plug. If you don’t have a drain pan this LIS17942 Drain Pan will easily hold all of the coolant that will be in your radiator.
- With the drain pan in place remove the drain plug from the radiator.
- To speed up the draining process you can remove your radiator cap.
- While the coolant is draining out of your radiator you can move onto draining the coolant out of your overflow tank. To do so you are going to have to siphon out the coolant. Make sure to safely siphon out the old coolant. You can use a siphon pump or simply suck on the end of a tube, make sure not to swallow any coolant.
- With all of the coolant from the radiator and overflow in the drain pan you are ready to move onto the next step. You will want to reinstall the radiator drain plug.
- Then fill the radiator with tap water completely full. This will help clean out the old coolant from your engine.
- Reinstall the radiator cap.
- Start the vehicle and let it run until it is at operating temperature. To tell if it is at operating temperature simply feel the upper radiator hose and once it has pressure the thermostat has opened up. Allow the vehicle to run with the open thermostat for several minutes insuring that the water is circulated throughout the cooling system.
- Shut the vehicle off, and allow to cool down for 10 to 20 minutes to prevent being burned by hot coolant.
- With the engine cool remove the radiator drain plug allowing the water that you added and old coolant to drain into the drain pan. Make sure if any coolant got into the overflow tank that you remove that as well.
- Repeat steps 9-13 one more time to insure that all of the old coolant is drained from the engine.
- After you have repeated steps 9-13 you are ready to move on. You will now need to fill your radiator with distilled water all the way to the top. Distilled water is key to the next steps because this will prevent mineral deposits from entering your freshly cleaned cooling system.
- With the radiator filled with distilled water start the engine.
- Next remove the radiator drain plug and allow the distilled water to drain into a drain pan.
- Slowly add distilled water to the radiator as it slowly drains out. Continue adding distilled water until the water coming out of the radiator is clean.
- Now shut the vehicle off. Drain the remaining distilled water from the radiator. Making sure to reinstall the drain plug when you are finished.
- You will then need to purchase the proper antifreeze for your specific vehicle.
- With the proper antifreeze you will then need to mix at a ratio of 50/50 antifreeze to distilled water.
- It is a good idea to mix them in a clean bucket together. That way you can check the mix using a coolant tester. If you don’t have a coolant tester this THX101 Coolant Tester will work. Make sure that the correct numbers of balls are floating for the situations that you will be driving in. If they are not floating then you will need to add more antifreeze until you get the correct mix.
- Once you have the correct mix take a funnel such as this LIS24680 Cooling System Funnel and fill your radiator to the neck.
- With the radiator full make sure to fill the overflow tank to the proper mark.
- Now that both the radiator and overflow tank are full you should start the vehicle.
- With the vehicle running slowly add coolant as needed to maintain a full radiator.
- Every couple seconds or so squeeze both the upper and lower radiator hoses. This will help air to escape your cooling system.
- After a couple minutes of your vehicle running and the level in the radiator staying steady and full you can reinstall the radiator cap.
- Shut the vehicle off.
- You can then take your vehicle for a test drive. After the drive make sure to check both the radiator level and the overflow level making sure they are both to the correct marks.
You just flushed your entire cooling system.
Written by: Cody an NDSCS Student
Tags: antifreeze, ATD, blz, coolant, Cooling System, Cooling System Flush, lis, lisle, overheating, radiator, radiator flush, thx, Tools


