
How to diagnose and replace a faulty O2 sensor using a Fluke 233/a multimeter

With gas mileage a major concern of many people today it is smart to know when you should replace your O2 sensor.
An O2 sensor or oxygen sensor sends a signal to the PCM or Powertrain Control Module in your vehicle and lets it know how much oxygen is in your exhaust. The O2 sensor is the main source of input on the PCM control of fuel. The O2 sensor can be misleading to the PCM however. If the O2 sensor is not functioning properly your vehicle can be running extremely rich, causing your vehicle to lack power and have a decrease in fuel mileage. The O2 sensor can also cause your vehicle to be running lean and can cause a dangerous situation for your vehicle engine.
Knowing what an O2 sensor does is important when it comes to diagnosing them correctly. Not only is this important, but knowing some of the symptoms of a faulty O2 sensor are also helpful.
Most manufacturers recommend that you replace your O2 sensor around the 50,000-90,000 mile range depending on the make of your vehicle and the specific O2 sensor that is in your car. With this in mind if your vehicle is in the mileage range listed and has some of our symptoms and is running the original O2 sensors, it might be wise to replace the O2 sensors.
Some of the symptoms of a faulty O2 sensor are:
- Poor fuel economy
- Decrease in power
- Check engine light (specifically fuel related codes and or O2 sensor codes)
- Black smoke out of the exhaust
- Engine misfire
These are some of the most common symptoms and may be unrelated, but we will discuss how to better diagnose your O2 sensor.
How to Diagnose
- If you are experiencing any of the symptoms above and your vehicle may be experiencing a worn out O2 sensor.
- Your check engine light should come on in most cases and may or may not be related to the O2 sensor, but if you are having a fuel related code it is good idea to look at your O2 sensors.
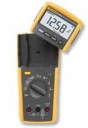
- The best method of diagnosing is using a scan tool to monitor the graph of voltage that the O2 sensor is sending the PCM. With scan tools costing thousands of dollars this is out of the question. There is an alternative which is to use a high impedance multimeter such as this Fluke 233/A. You will need to locate the signal wire. Once you have the signal wire located you will need to use a pin or needle and back probe the connector. Connect the positive lead to your meter and the negative to a good chassis ground. Then set the multimeter to millivolts DC. I recommend moving the auto range off. Start the vehicle and watch the meter. A cold engine should show a low reading if not an open. You want the engine to stay below 400 millivolts when cold. Once the engine has been running a minute or two you should see the voltage start to change. The voltage should not be greater than 1 volt DC. If you look on the bottom of your meter you should see the line that shows the voltage going back and forth. Another good test using a simple multimeter is to set it to frequency and this will measure in Hertz. This is cycles per second and for the average vehicle it should be between 1-5 Hz depending on your application. It could even be a higher reading if you have a new vehicle. If you do not see one of these things then it is likely that you have an O2 sensor that is faulty. If you are uncomfortable doing this test or want to make sure, then take your vehicle to a mechanic and have them check it out.
After talking about how to diagnose a faulty O2 sensor we will now go into how to replace the O2 sensor.
- Jack the vehicle up in the air so that you can get to the O2 sensor. Make sure to place the vehicle on jack stands. If you don’t have a jack and jack stands this ATD7500 3 Ton Jack Pack contains a jack and stands.
- Remove the battery cables both negative and positive to prevent accidently shorting a component.
- With the vehicle in the air locate the O2 sensors. They will be located on the exhaust piping. You will have to remove the electrical connectors from the O2 sensors.
- Now that the connectors are out of the way take some penetrating oil and spray on the O2 sensors. Let the penetrating oil sit for 15 minutes and soak into the metal.
- You are ready to remove the O2 sensor. There are several ways to go about this. The first would be to get a wrench and use; otherwise you can get a special O2 sensor socket that will fit your O2 sensor. Here is a LIS12100 Oxygen Sensor Socket. Note: If your O2 sensor is not coming loose you can take and hold your wrench tightly in the counterclockwise direction, then take a hammer and hit the end of your wrench. The hammer acts like an impact and will break the O2 sensor loose.
- With your old O2 sensor removed match it up with your new one making sure they are the same.
- Before threading in your new sensor apply some high temperature anti-seize lubricant to the threads.
- Torque down the O2 sensor and reconnect the electrical connectors.
- It is a good idea to let your car sit with the battery disconnected for at least half an hour, this will reset the computer allowing your O2 sensors to not have to work against the PCM. The PCM learns how your vehicle is running and since you had faulty O2 sensors in the vehicle it will think you still do unless you disconnect the battery and reset the PCM.
You just finished diagnosing and installing your O2 sensors on your vehicle. Test drive your vehicle and ensure that you have everything working correctly.
Written by: Cody Mammenga an NDSCS Student
Tags: ATD, flu, fluke, fuel mileage, gas mileage, jack, jack stands, lean, lis, lisle, O2 sensor, oxygen sensor, PCM, powertrain control module, rich, Tools